Gaggia Classic Pro Elegant Hack Stage 1 - Build
OK, the fun parts starts.
What You Need to Be Willing to Do
- Open up your Gaggia and remove and insert a few connectors (This instruction will be based on the new version of Gaggia Classic Pro 2019+ with the new wiring and new professional steam wand)
- Very little soldering but still some
- Need to flash Arduino firmware to a new Arduino Nano Every board. (You don't have to write the software but need to know how to download and flash it)
- Have a 3D printer, find a friend who does, or pay someone to print this for you

The Enclosure
Hope you know someone with a 3D printer or alternatively you can pay someone to print this for you via Thingiverse. Here is the link to the Thingiverse STL file download location (https://www.thingiverse.com/thing:4972335)
You will need to print,
- 1 x bottom bottom
- 1 x box top
- 2 x end panel
- 1 x OLED Enclosure
Put it together like building a Lego. Hot glue the OLED enclosure to the end of the enclosure.

The Brain (Electronics)
You need to buy the following parts. (I think I spend less than $70 for the following parts)
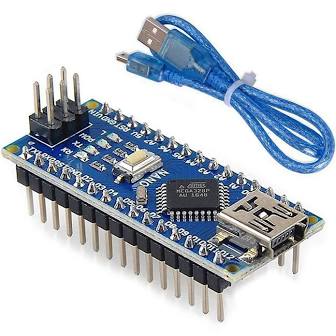
- Arduino Nano Every - this is a very small latest hardware version of Arduino Nano. It fits nicely in the enclosure box. (You can buy the version with the header pins already soldered - here from official Arduino store or buy it without the pre-solder so you can do it yourself for cheaper). Solder the pin headers on to the Arduino Nano if you have not done so.
- 1.5 inch OLED Display (here on Amazon). You can use other displays but you will need to modified the code substantially
- Two 5V power supplies. This is what I used set of two. (here on Amazon). One of the 5V power supply will be used to power the Arduino. The second 5V power supply will be used as the steam switch detector. These will work on US AC voltage of 120v (Or 240V for Europe)
- Crimp Terminal Connectors - You will also need some connectors for the Crimp Terminal. I bought this kit (here on Amazon) per the recommendation of Robert Kujawa's "How to install a PID on a Gaggia Classic PRO" Youtube Video. You will have a lot leftover for future projects.
- Wires - Since we are dealing with very little current, a small gauge silicon wire that can stand high temperature is best. (here on Amazon). You will have a lot leftover for future projects.
- Arduino Connector Wires - Of course you can solder all the wires directly to the Arduino Nano but I found it to be easier to use the plug connectors to tinker. Once I am done with all the modification, just hot glue the connector in place to prevent it from disconnecting due to vibration. (here on Amazon)
The Firmware
- The Arduino Nano firmware that I wrote for Gaggia is Open-source and GNU 3.0 licensed (Download here GitHub). You are certainly welcomed to download and modify. Have fun!
Useful Reference Information
- The wiring diagram that I used to create the connection is available on Whole Latte Love's website. (linked HERE). This is the diagram for Classic Pro 2019+ which is my version. If you have an older version, I think it is still possible to do the switch connections but it might be more complicated. You may need another 5V power supply to do the brewing switch ON detection. The 2019 Classic Pro has unused switch terminals that you can just wire directly to the Arduino using one terminal HIGH with pull-up and another terminal connection to ground. This is directly compatible with Arduino without extra AC voltage detection.
Putting It All Together
Time to assemble everything. - Flashing the Arduino Nano Every - There are a lot of resources and tutorials on how to get started. Basically,
- Download the Arduino development environment on your computer (Download Here)
- Install on your computer
- Plug in your Arduino Every board into the USB cable it comes with and connect it to your computer
- Open the Arduino application on your computer
- Click on Tools -> Boardxxxx -> Arduino MegaAVR Boards -> Arduino Nano Every

- Click on Tools -> Register emulation -> None (ATMEGA 4809). This is used for older libraries that did not properly support the new faster processor on the Arduino Nano Every. Everything we are using natively supports the faster processor.

- Select the port that your computer will be talking with Arduino on. (Typically click on Tools -> Port -> One of the devices shown when you insert your Arduino USB cable)
- Download the Arduino firmware from GitHub - Right click on Gaggia-steam.ino and "Download Linked File as". Save it on your computer.
- Open this file that you just downloaded either with the Arduino IDE or double click this file in your finder/file explorer
- Click the "Upload" icon show below. This will compile and flash the source code you downloaded to the Arduino board.

- Unplug and you are ready to connect it to your espresso machine
Coming Up - Wiring Diagram
- Flashing the Arduino Nano Every - There are a lot of resources and tutorials on how to get started. Basically,
- Download the Arduino development environment on your computer (Download Here)
- Install on your computer
- Plug in your Arduino Every board into the USB cable it comes with and connect it to your computer
- Open the Arduino application on your computer
- Click on Tools -> Boardxxxx -> Arduino MegaAVR Boards -> Arduino Nano Every
- Click on Tools -> Register emulation -> None (ATMEGA 4809). This is used for older libraries that did not properly support the new faster processor on the Arduino Nano Every. Everything we are using natively supports the faster processor.

- Select the port that your computer will be talking with Arduino on. (Typically click on Tools -> Port -> One of the devices shown when you insert your Arduino USB cable)
- Download the Arduino firmware from GitHub - Right click on Gaggia-steam.ino and "Download Linked File as". Save it on your computer.
- Open this file that you just downloaded either with the Arduino IDE or double click this file in your finder/file explorer
- Click the "Upload" icon show below. This will compile and flash the source code you downloaded to the Arduino board.

- Unplug and you are ready to connect it to your espresso machine
Coming Up - Wiring Diagram


Comments
Post a Comment